Fivebraids Custom Woodworking, Inc.
Purveyor of "Things Wooden"
Metter, Georgia
*** Business and Retail Shop Closed. ***
Thanks for your support
|
|
Fivebraids Custom Woodworking, Inc.Purveyor of "Things Wooden"Metter, Georgia*** Business and Retail Shop Closed. ***
Thanks for your support
|
|
Queen Anne Style Dressing TableClick on any thumbnail below for full size picture
This custom piece was commissioned by the curators of a local Statesboro Georgia museum. They needed a lockable piece to display a jewelry collection for special events held at the museum.The piece needed to fit in with the other furniture pieces that were already in the museum, a combination of Hepplewhite, Chippendale, and Queen Anne styles. Since the jewelry collection is stored off site and is only displayed during special events, the piece needed to stand on its own when not being used to display the jewelry, and not look like an empty display case.After considering several different options, the clients agreed that a modified reproduction Mahogany Queen Anne Dressing Table would fit their requirements.
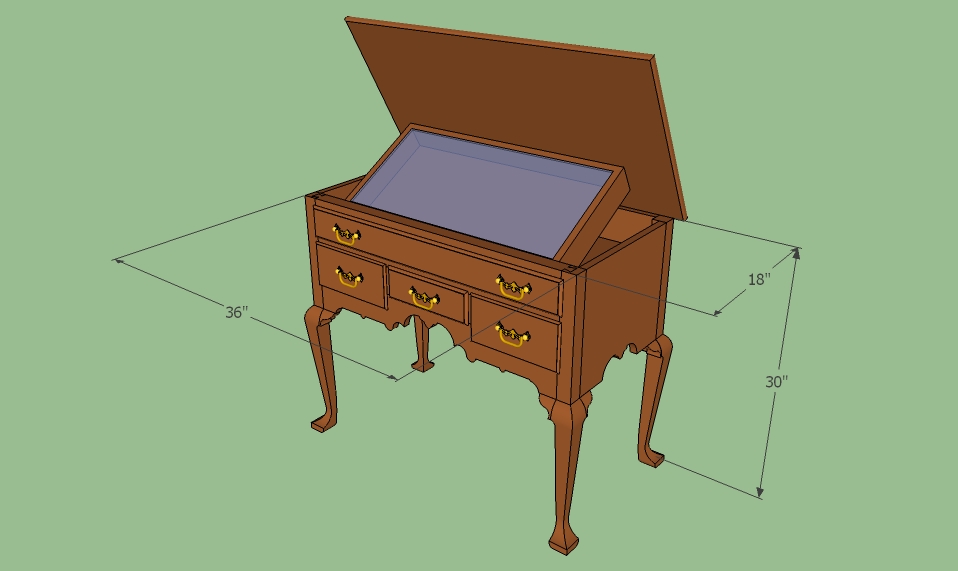
As with all projects. CAD drawings were created and submitted for approval:
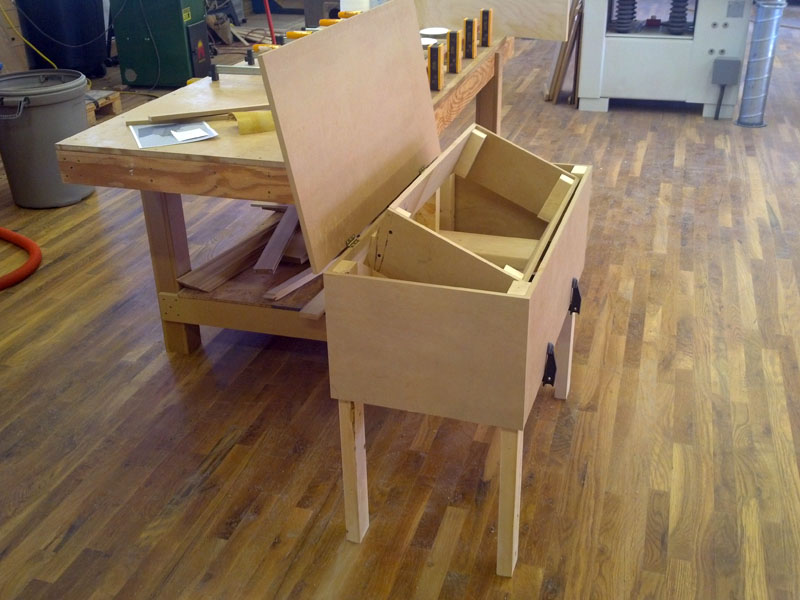
Once the clients approved the CAD drawings, a full scale prototype was built and brought to the museum to make sure the dimensions and basic design concepts were approved:
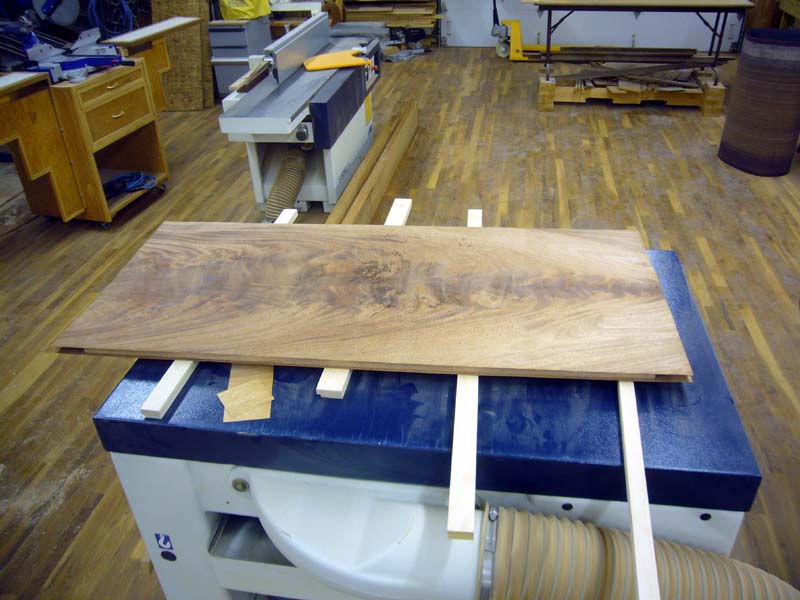
With the prototype approved, material decisions were made. The basic carcass would be made of a solid Mahogany and Baltic Birch plywood substrate covered in a straight grained Mahogany veneer. Since there were only a few weeks to complete and deliver the piece, and to help meet the budget constraints of the museum, the cabriole legs would be purchased rather than built in house.
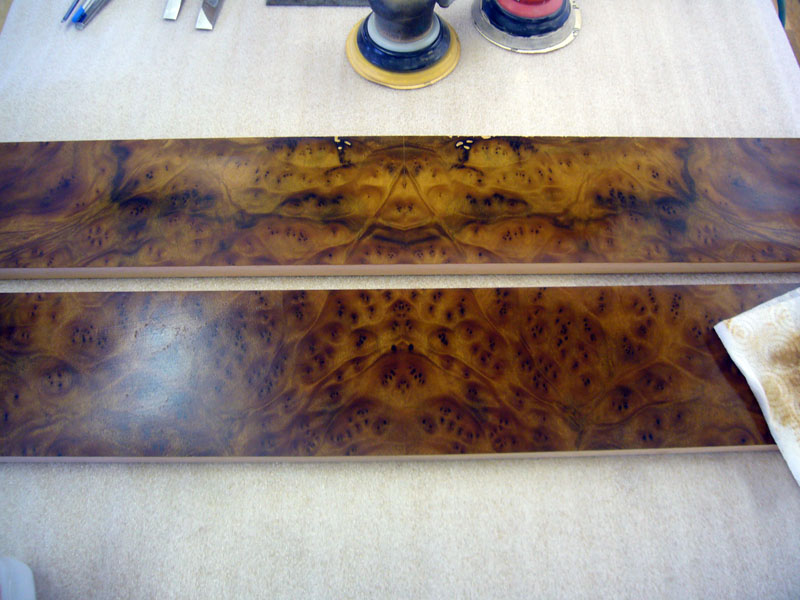
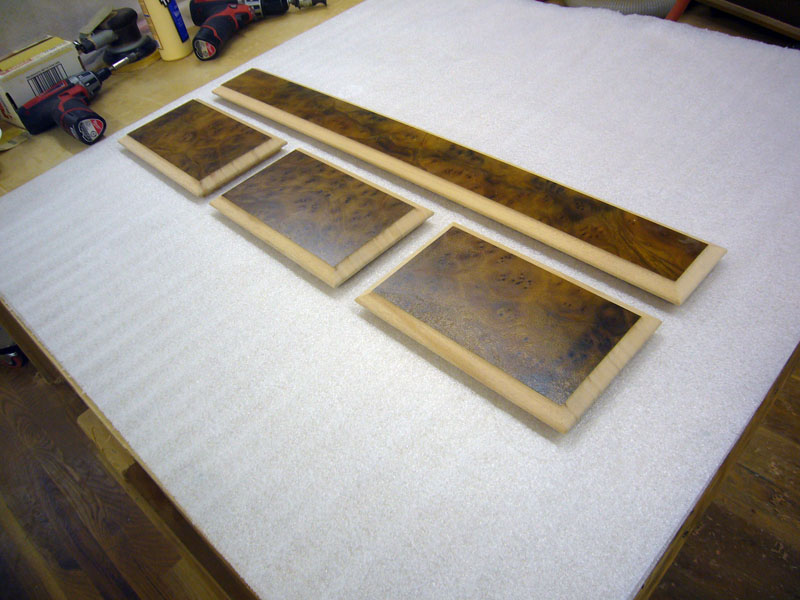
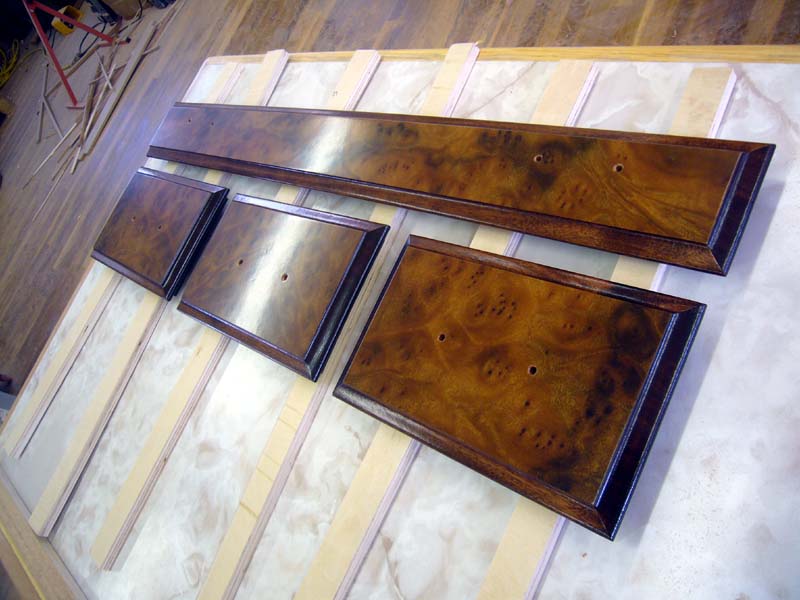
A dramatic Mahogany Crotch Veneer was chosen for both sides of the top lid. An equally dramatic Camphor Burl veneer was chosen for the false drawer fronts:
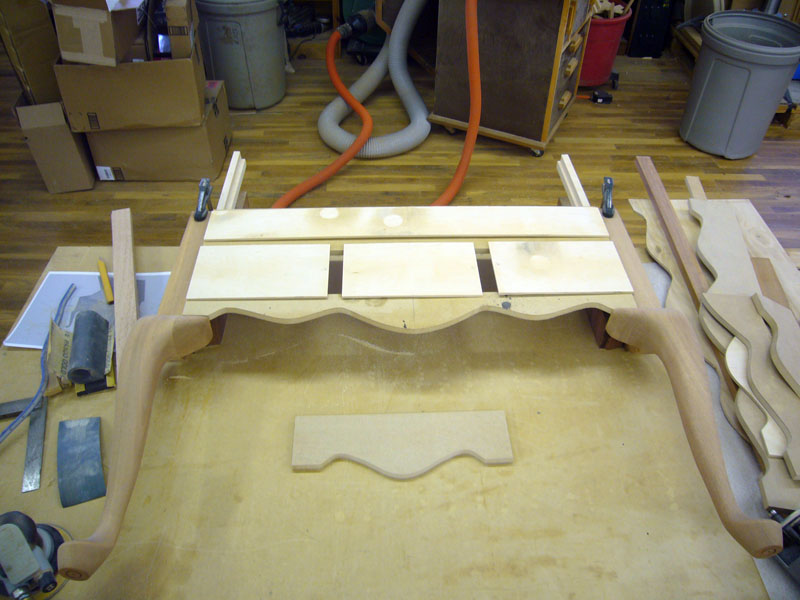
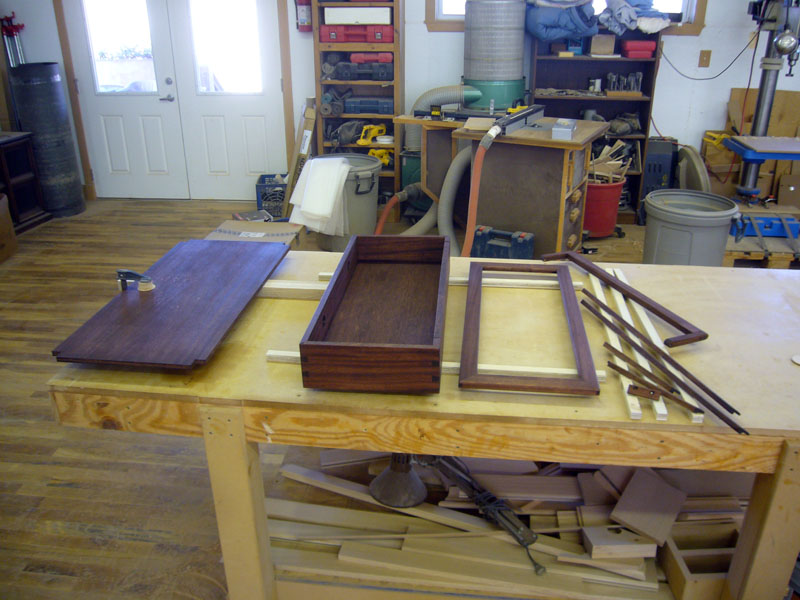
With the lid constructed, and the crotch veneer applied, and the burl applied to the drawer fronts, it was time to come up with a visually pleasing design for overall piece. This included a scroll for the bottom of the front and sides, as well as dimensions and layout for the false drawer fronts:
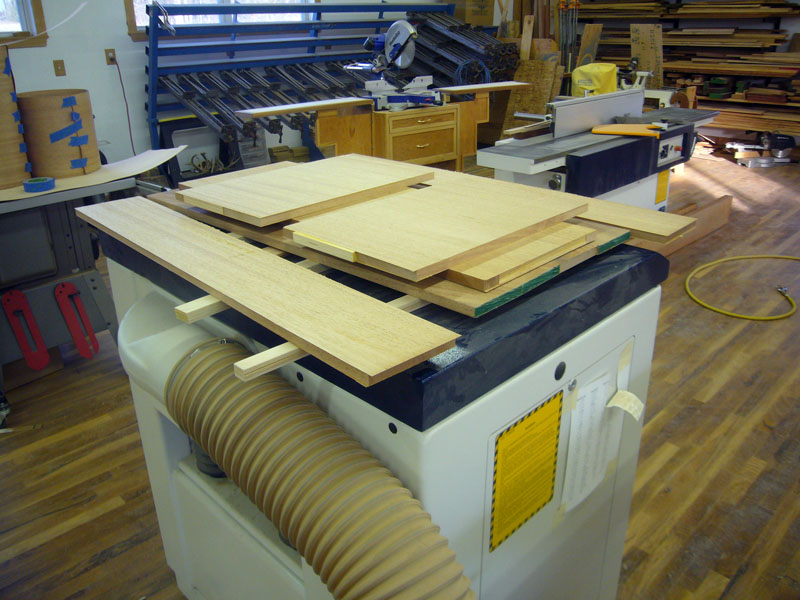
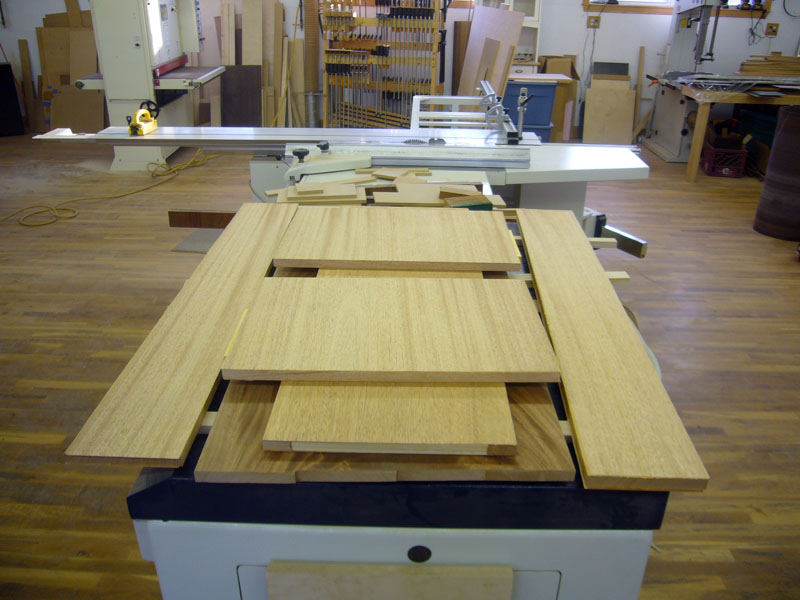
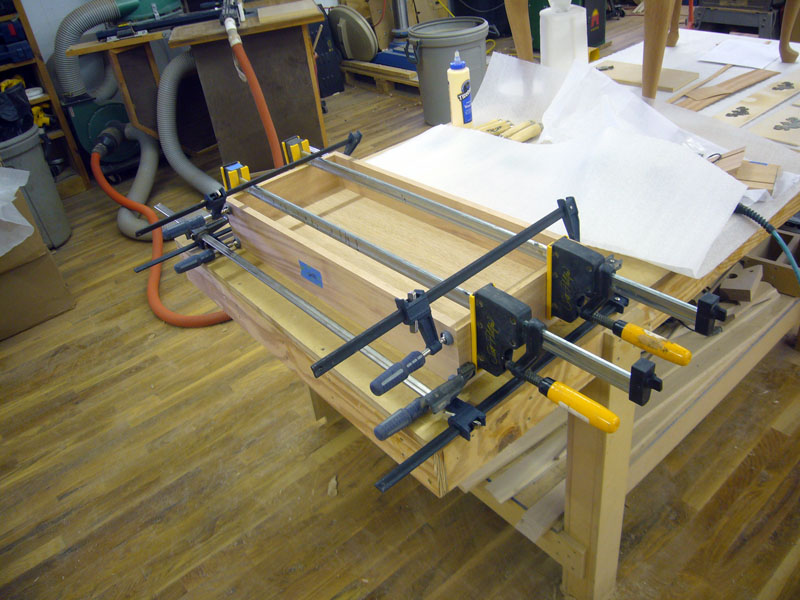
With the designs determined, parts were milled and veneered:
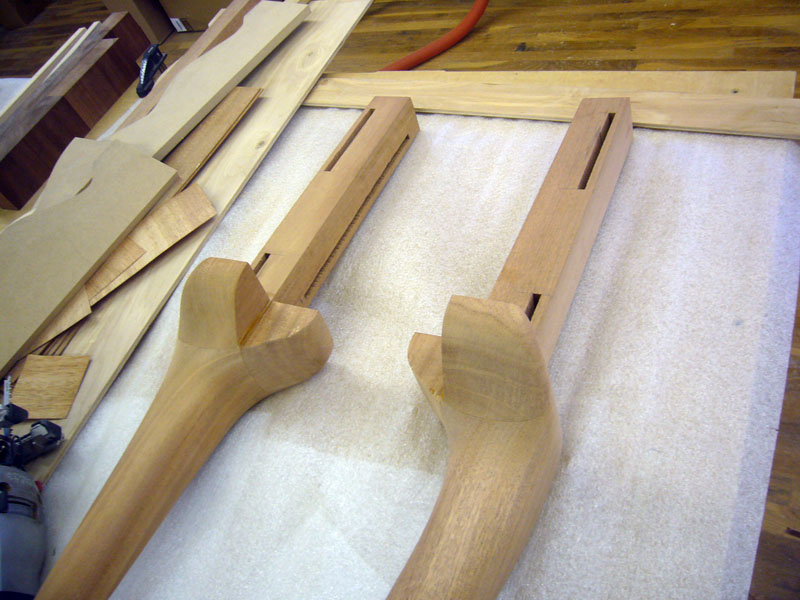
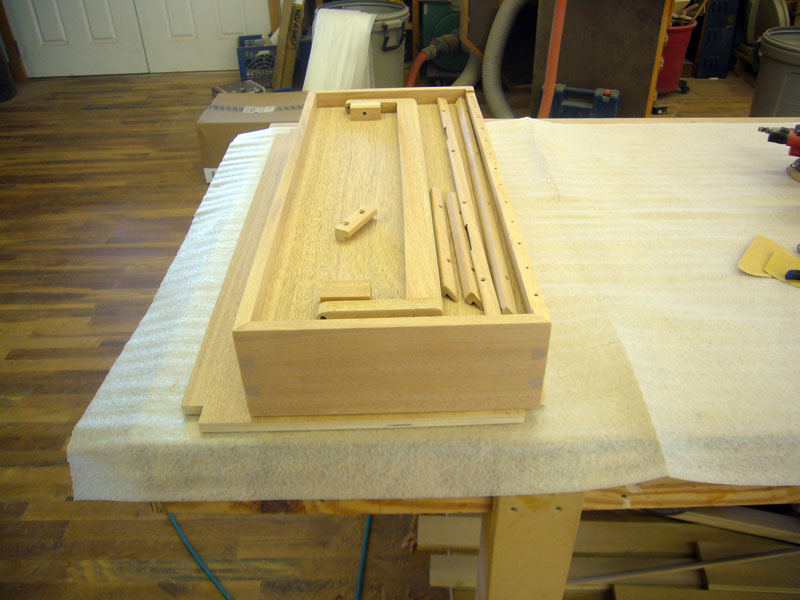
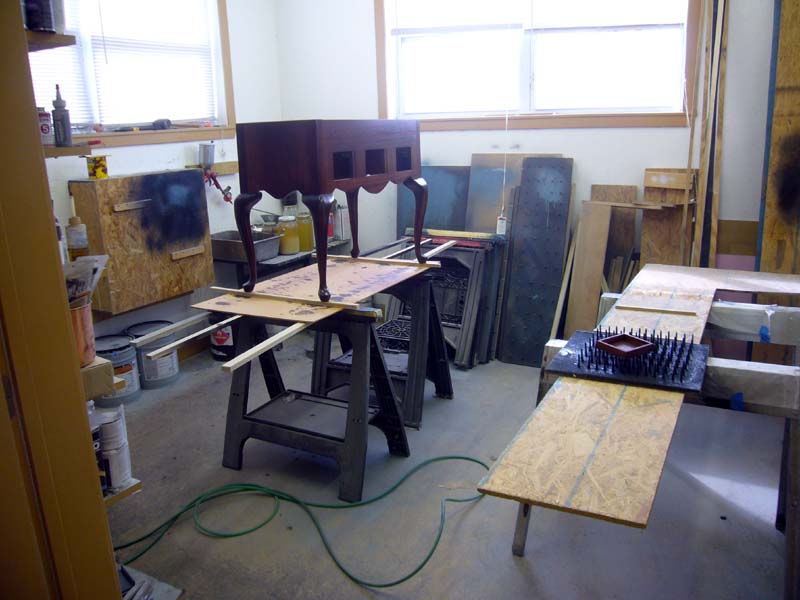
Next came mortises in the legs to house the front, back, and sides:
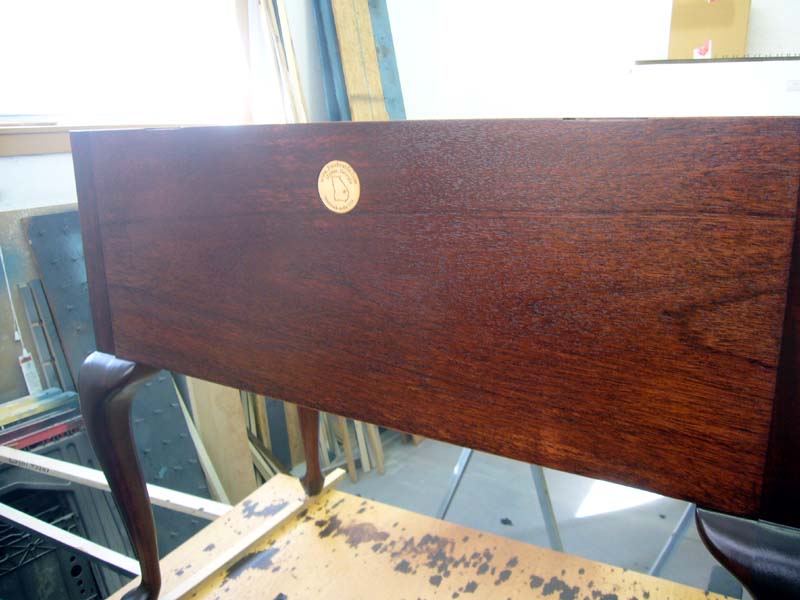
Since the legs are manufactured on a computer controlled lathe, they exhibit typical lathe center marks on both ends. Under normal conditions, these marks would not be seen since they would be under the lid of the table. Since the lid of this piece would be lifted to reveal the jewelry collection, these marks needed to be covered...with thin pieces of solid Mahogany: 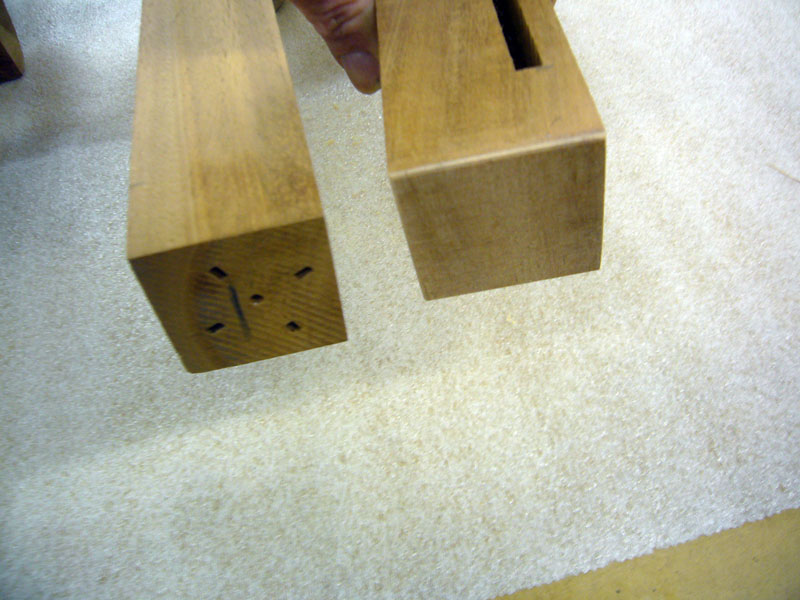 With the case done, it was time to build the solid Mahogany display case.
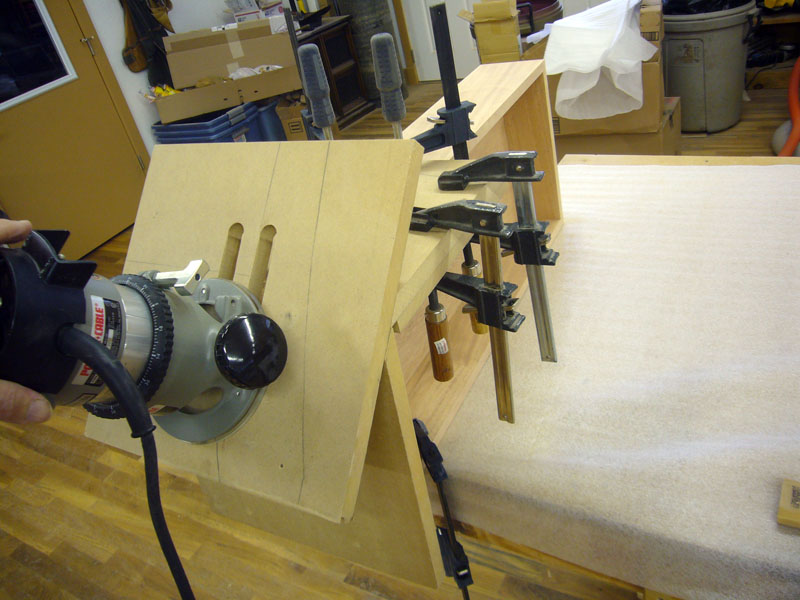
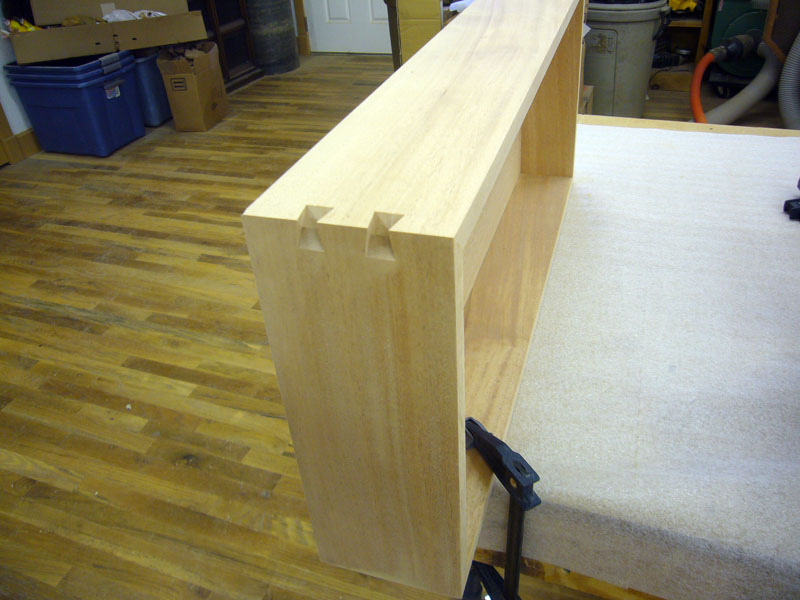
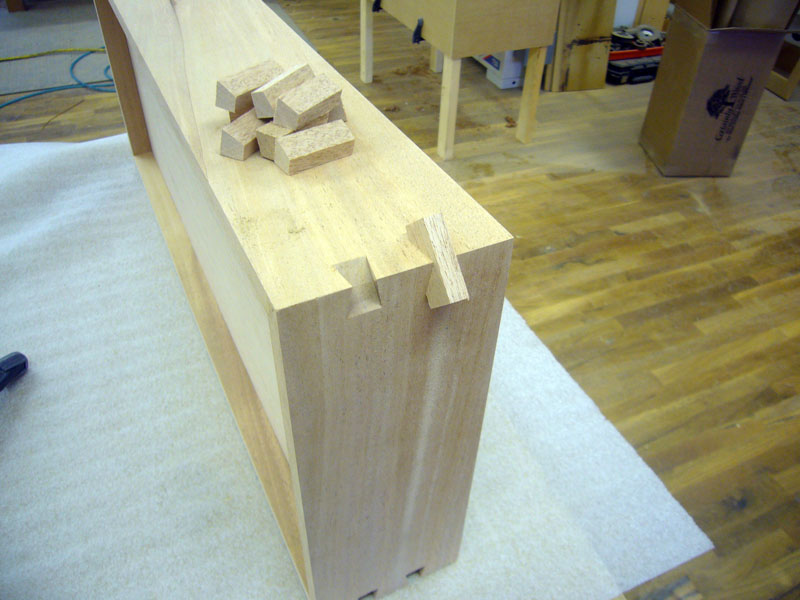
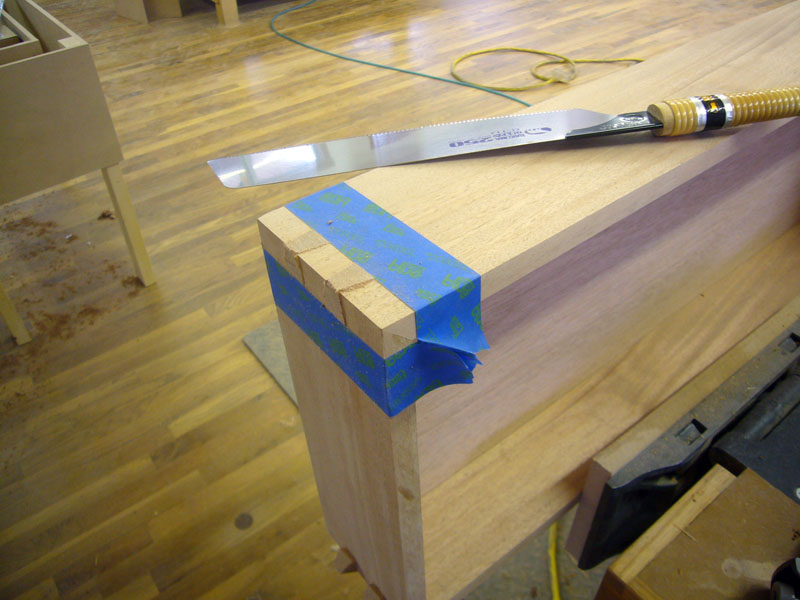
To reinforce the mitered corners of the box and lid, a jig was built to allow dovetail slots to be milled across the corners. Mahogany dovetail keys were made and glued into the slots:
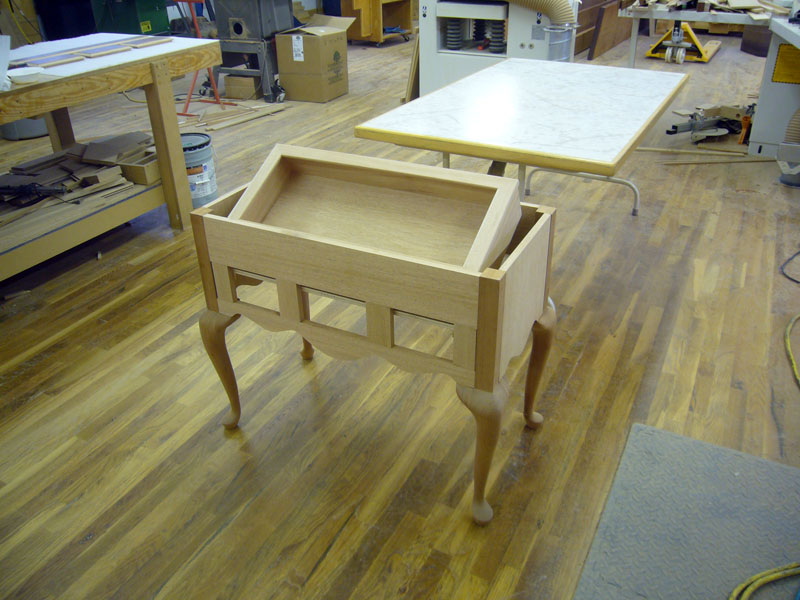
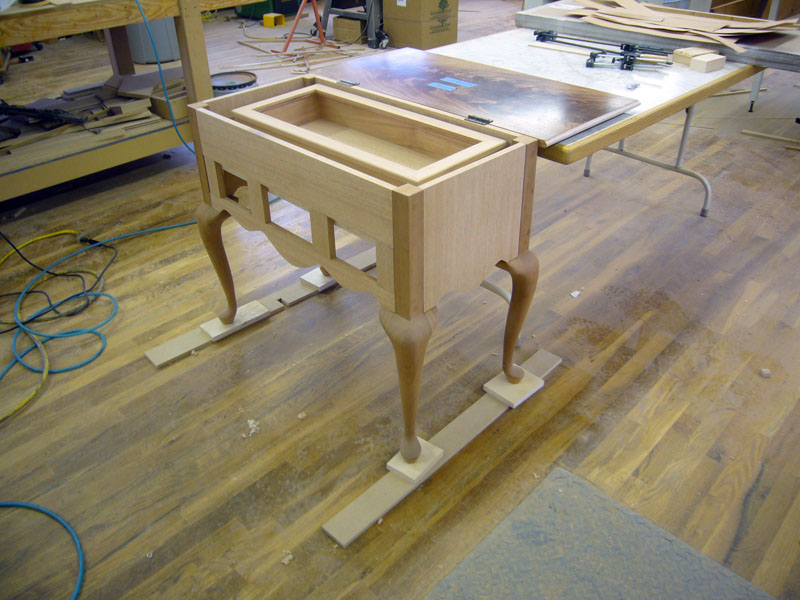
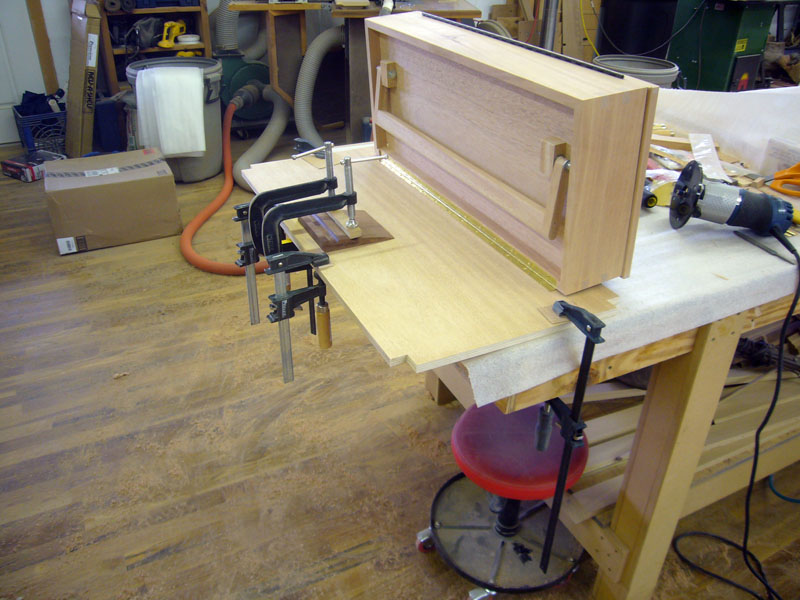
With the box built, it was time to check the fit and make a veneered shelf for it to sit on:
Time to mount the hardware. Hinges were mortised into the lid and case. A support system was designed and built to allow the display box to be tilted for viewing. A lid support was mounted to allow the lid to be held open when displaying the jewelry:
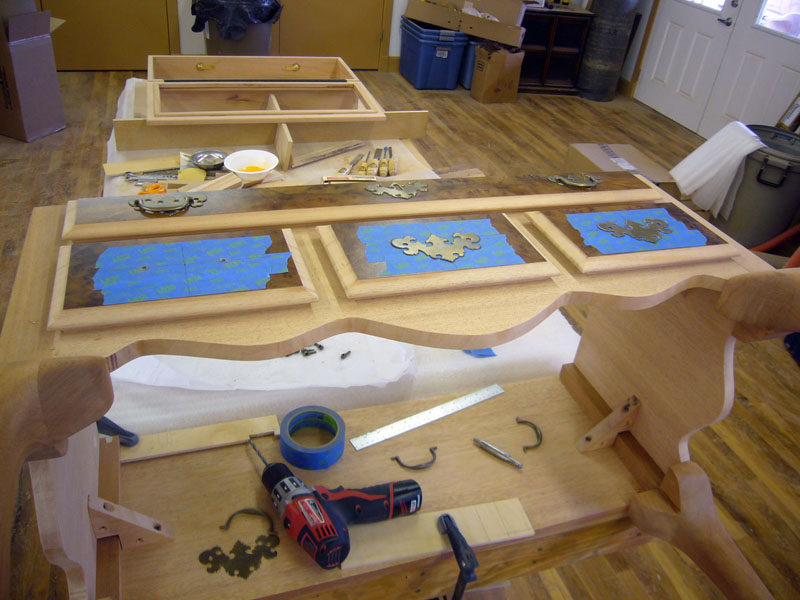
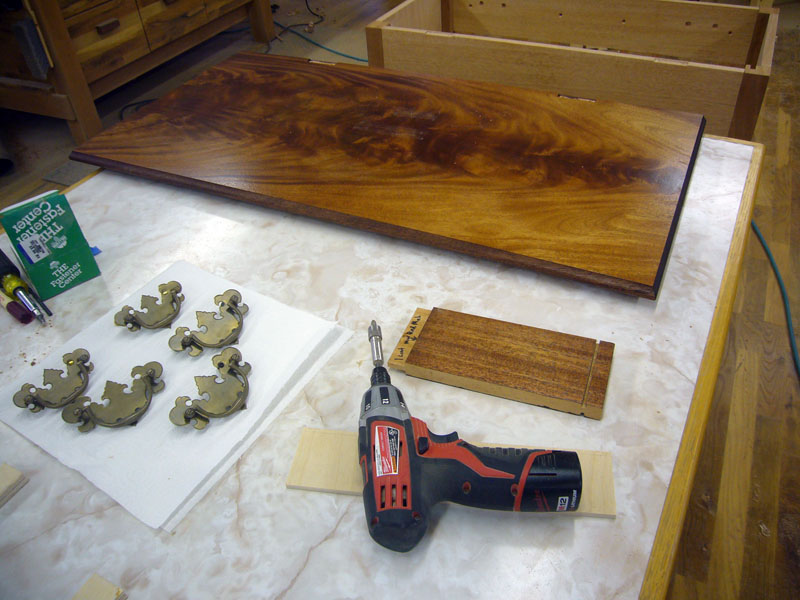
Profiles were milled on the edge of the drawer fronts. Period appropriate pulls were then located and mounted. The drawer fronts were then mounted to the case:
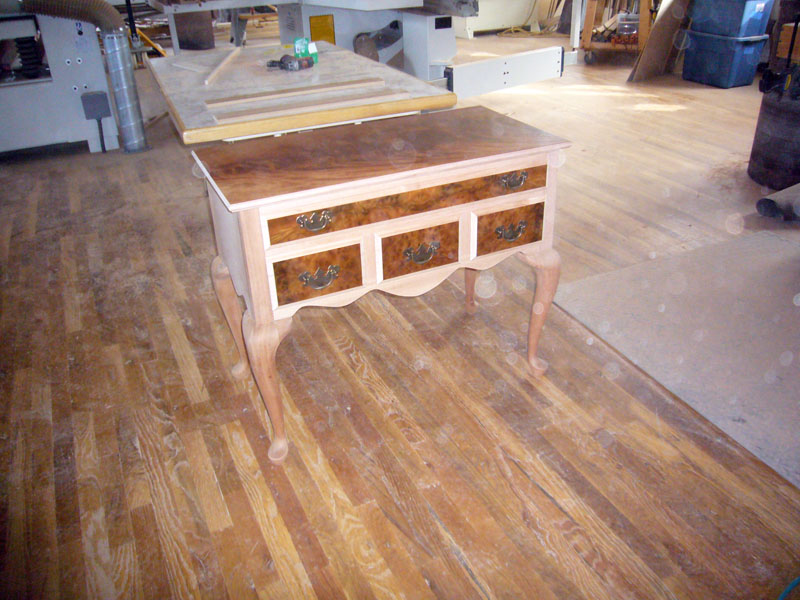
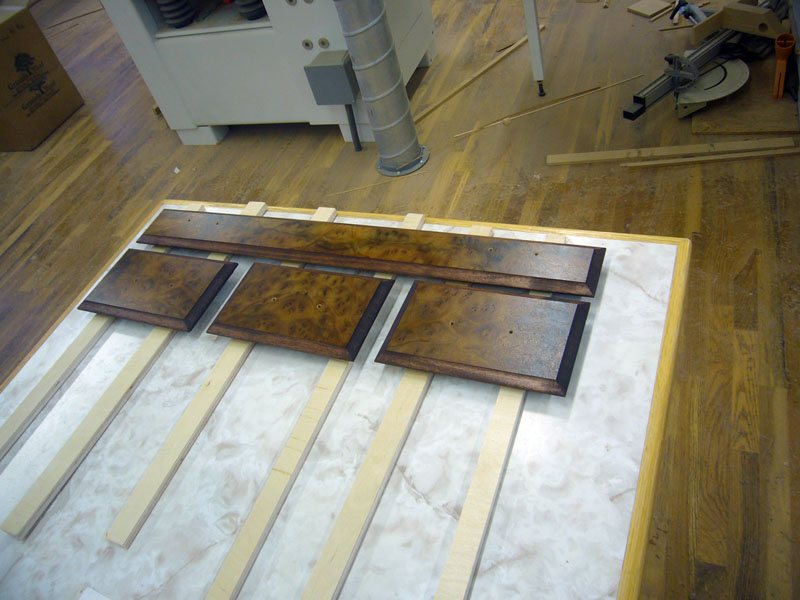
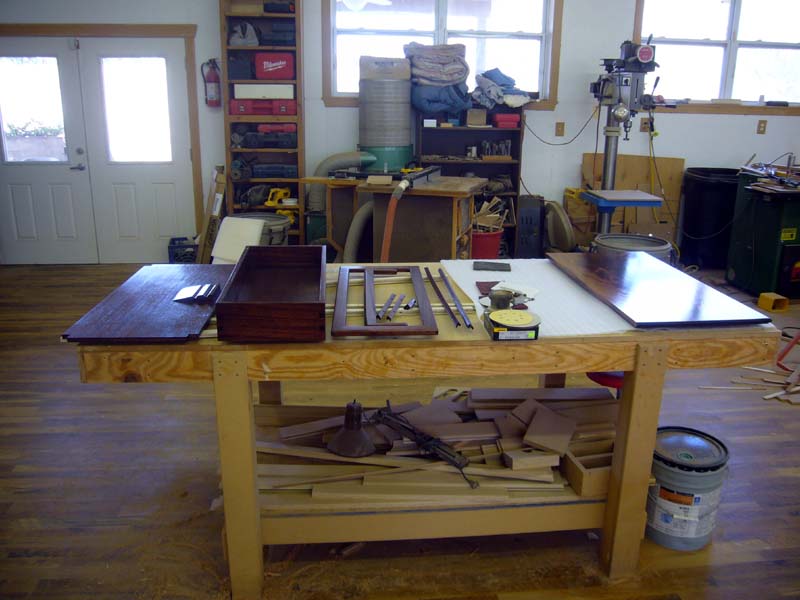
With all construction completed, it was time to disassemble the piece and get everything stained:
Several coats of lacquer sanding sealer were applied to all parts. Hand sanding made the parts smooth and ready for several coats of lacquer top coat:
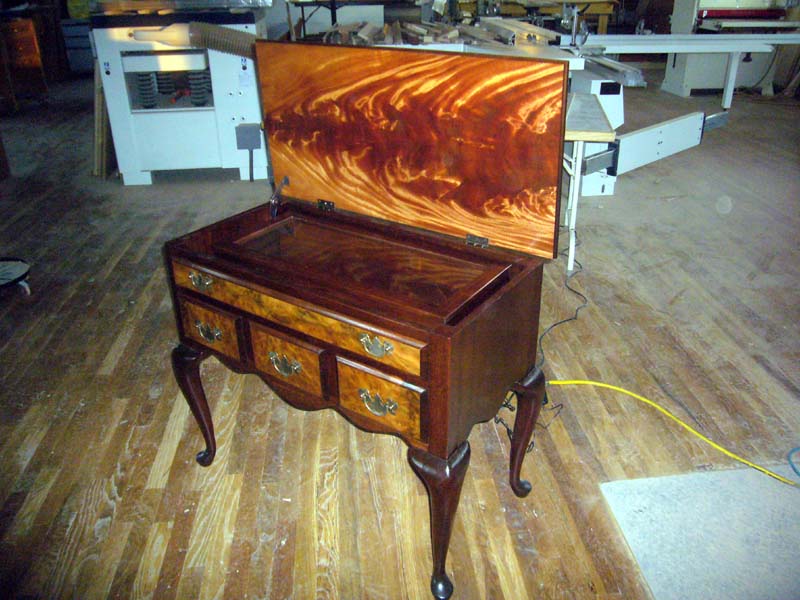
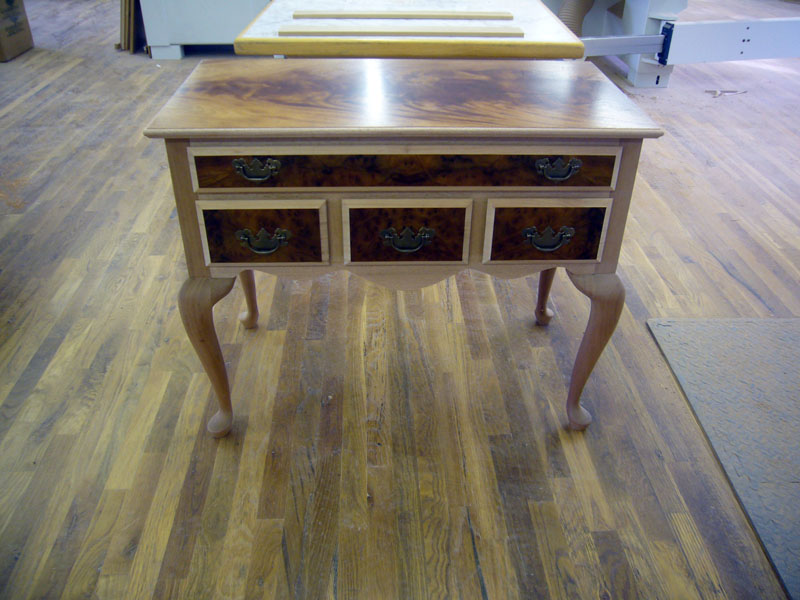
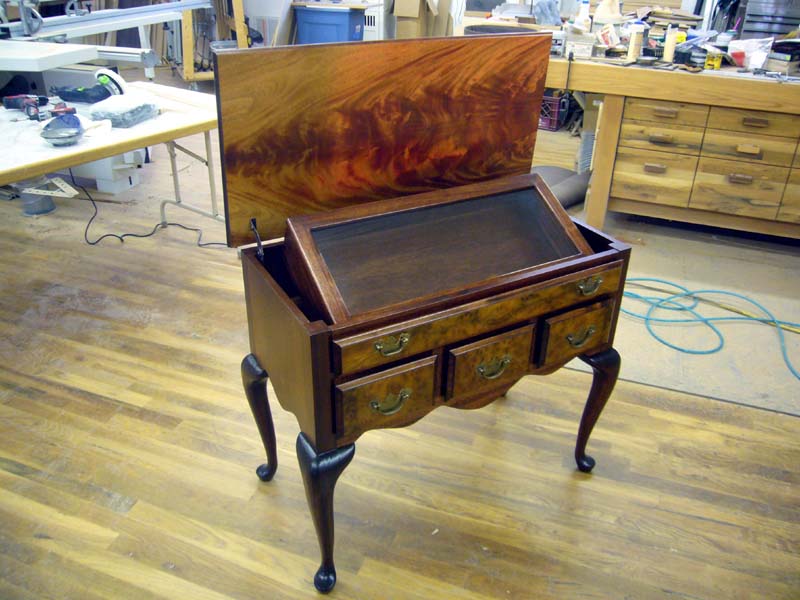
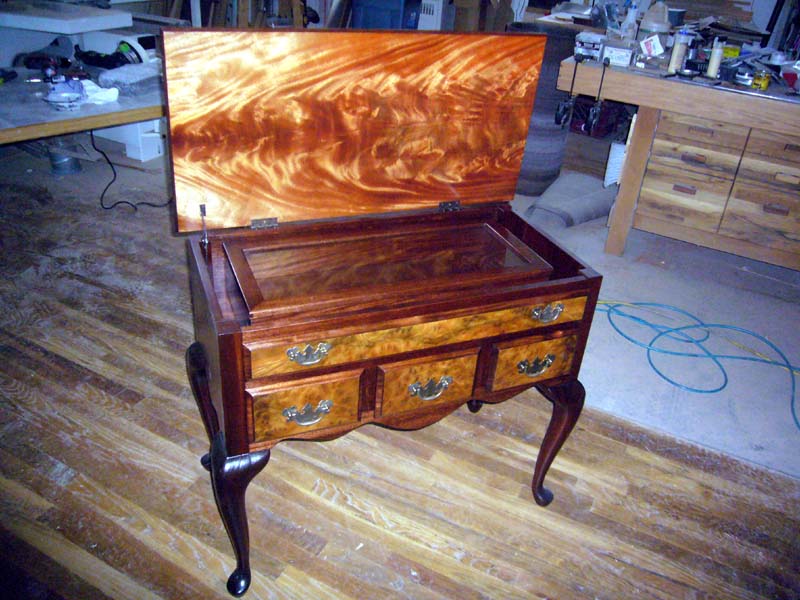
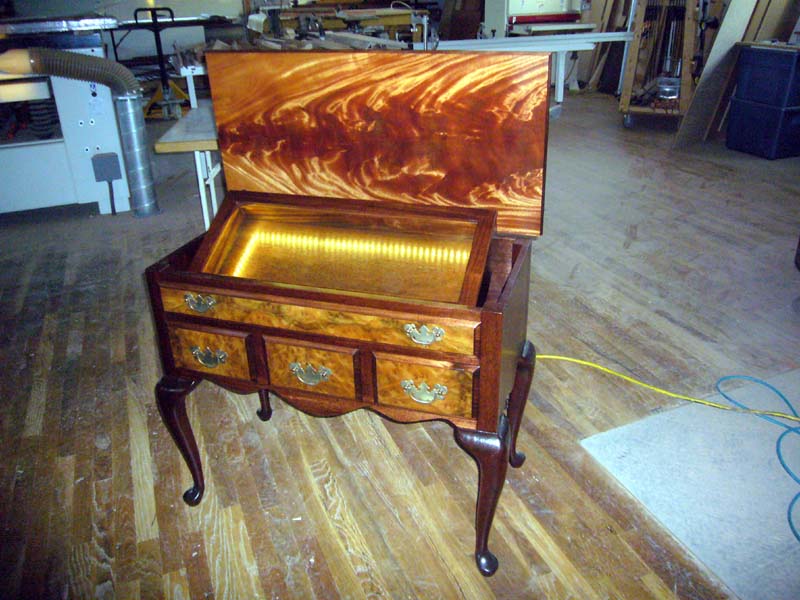
The lacquer top coat was allowed to cure for a few days, then the piece was reassembled and ready for delivery:
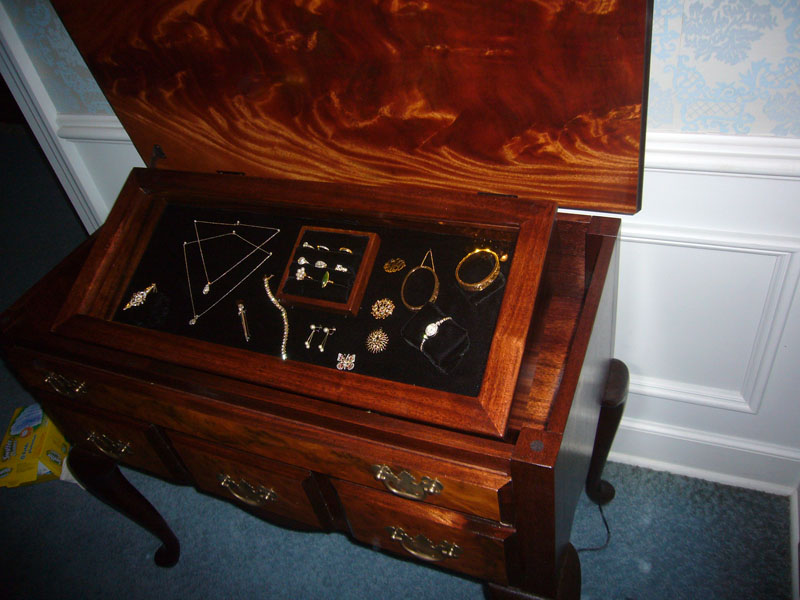
Oh yeah, low voltage, dimmable LED lighting was installed to illuminate the interior of the display box:
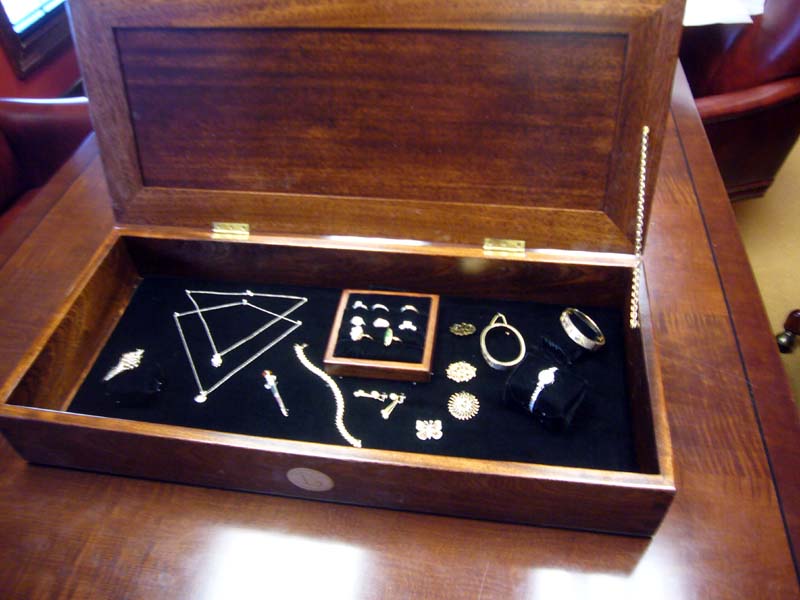
When the piece was delivered, a designer was brought in to arrange the jewelry collection on a velvet board that fits inside the display box. Here's what the final product looked like in the museum:
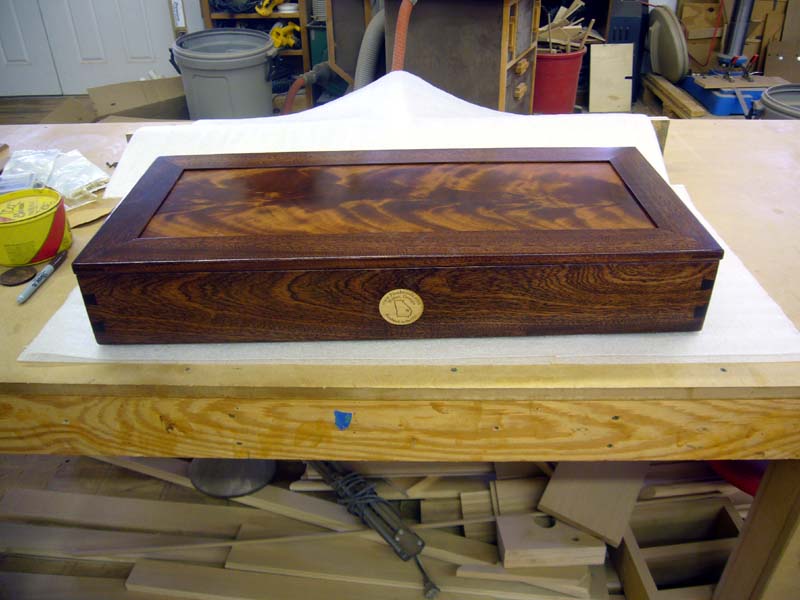
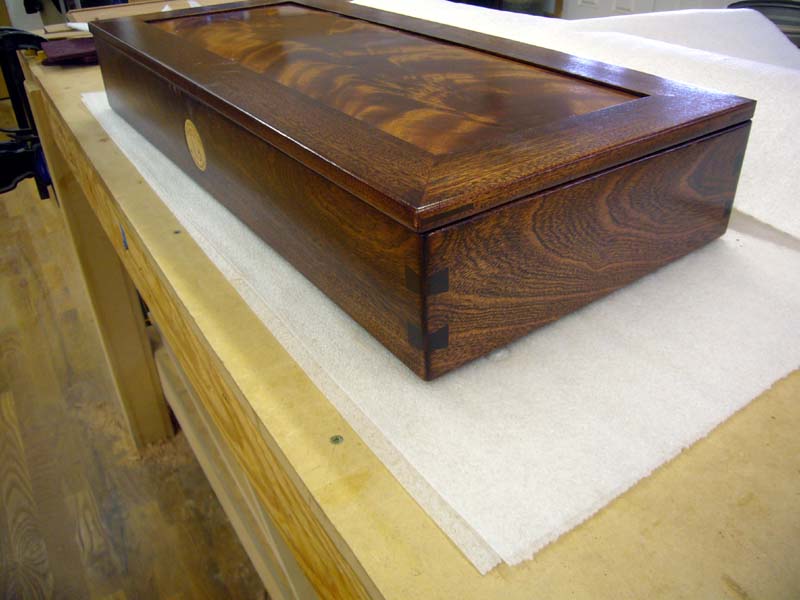
The plan was to take a picture of the designers layout of the jewelry for the curators to refer to. They would use this picture to replace the jewelry as designed when it was brought to the museum. This wasn't going to prove to be as easy as originally planned. Instead, a carrying case was built to match the piece. The designers board with the jewelry laid out will be stored and transported in this case. Once at the museum, the intact board will be transferred to the display box inside the piece:
|